Every woman wants to have a slender waist. But doing a bunch of crunches is not always enough. In fact, there are some abdominal exercises that increase the waist. How can you get results, avoid mistakes, and learn about effective exercises to get the shape you want?
We gathered great tips from experienced trainers to figure out how to finally get a thinner waistline.
What Affects The Shape Of The Body?
In fact, the appearance of a person’s waist depends on the type of figure they have. Depending on the “hourglass” or “pear” body type, you may be able to maintain your shape even when you gain weight. The ‘Ruler’ and ‘Apple’ body types that gain weight tend to get shapely in their upper body.
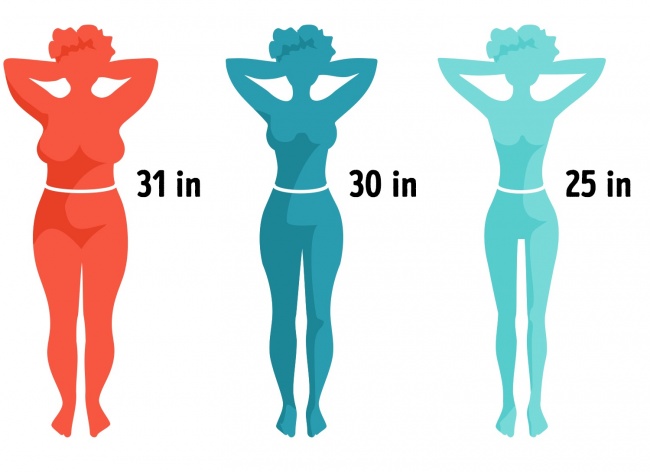
Trainers collectively say that these three things are harmful to any waist:
- weight gain
- protruding belly
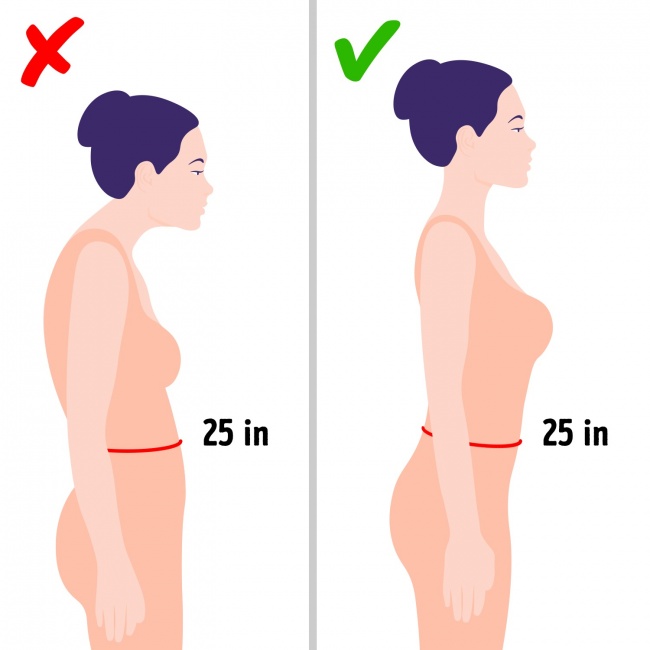
- Bad posture
A healthy waist does not appear on its own, it is the result of taking good care of the body. But there are ways to make it look better, depending on how you choose to dress and carry yourself.
Shaping The Waist
Shaping the waist means working on your abdominal muscles. But, as you probably know, working on it does not guarantee the removal of the fat layer. Therefore, it is necessary to create a calorie deficit with the help of:
- balanced nutrition
- cardio training
A trained muscle corset and proper posture visually stretch and refine the silhouette. Achieve a slimmer mid-section by:
- doing back stretches and controlling posture
- shapes the waist and flattens the belly with specific exercises
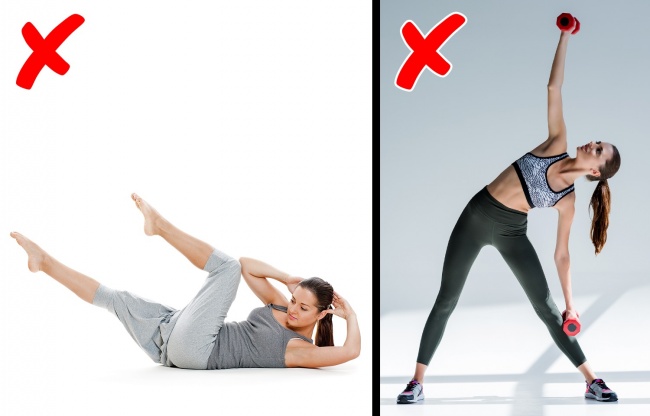
It is important to remember that not all abdominal exercises are useful for the waist. In fact, some exercises really expand it. Competent trainers say that to form a graceful waist, you must pay attention to the straight abdominis muscle of the press while “pumping” the oblique muscles, leading to an extension of the waist.
Here are the most “dangerous” exercises of this type:
- body turns
- side bends with weights
- side bends while sitting on the floor
At the same time, stretching the side muscles in several static turns during yoga or pilates can form beautiful body lines.
5 Best Exercises To Get A Small Waist
This set of exercises is best performed in the written order, three times a week. The best time to exercise is in the morning.
1. Vacuum
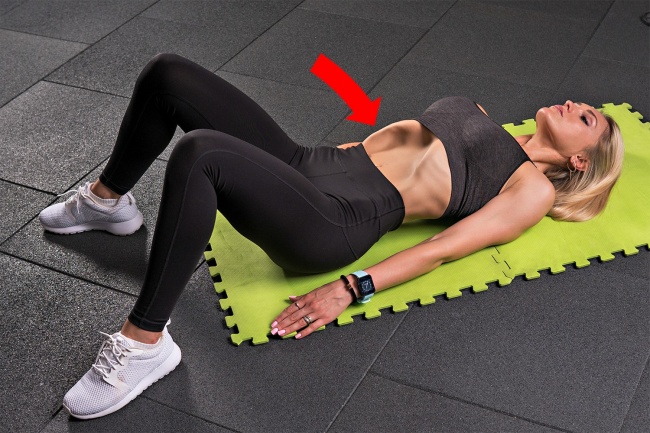
Starting position: lying on your back, legs bent over knees and arms down on either side of the body. This exercise should be done on an empty stomach.
Take a deep breath, exhale through the mouth releasing air from the lungs as much as possible, while pressing the front wall of the abdomen into the spine.
In this position, gravity helps you. Stay in this position for 15 seconds and relax. Gradually, you can bring the duration of “expiration” to one minute, as long as you feel free to do so.
Rep: 3 to 5 times.
Training duration: 2 minutes or more.
People with health or stomach problems should be careful when performing “vacuum” exercises. This exercise increases intra-abdominal pressure, which can adversely affect unhealthy organs. The exercise is contraindicated in asthma, herniated spine, and heart disease.
2. Bending Forward/Backward
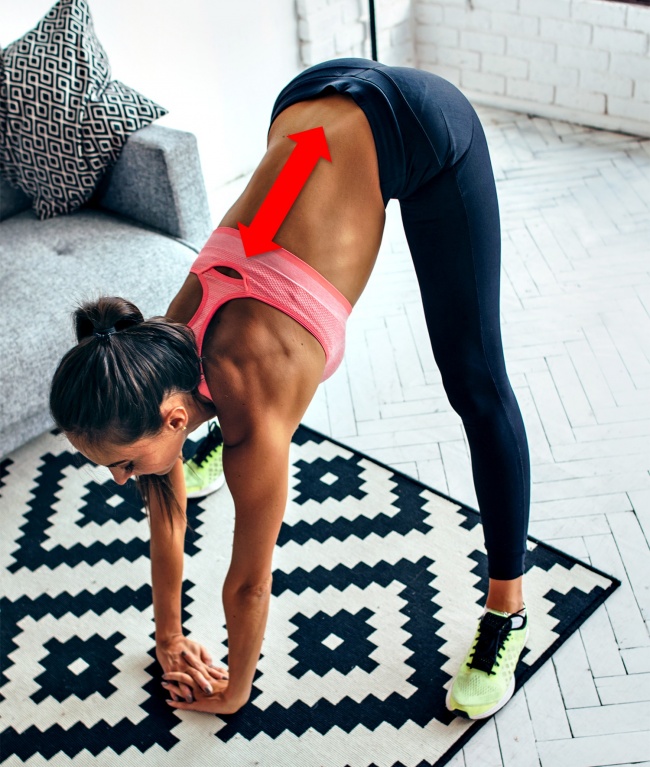
Starting position: Stand with your feet shoulder-width apart.
The purpose of the exercise: you should feel the muscles of your waist stretching. Bend forward so you can touch the floor and stay in that position for a while. After this curve, hold your arms at your waist.
Rep: 15 to 20 times.
Training duration: 2 minutes or more.
This exercise will be useful for those with low back problems, chronic headaches, or increased intracranial pressure.
3. “Boxing” Twists
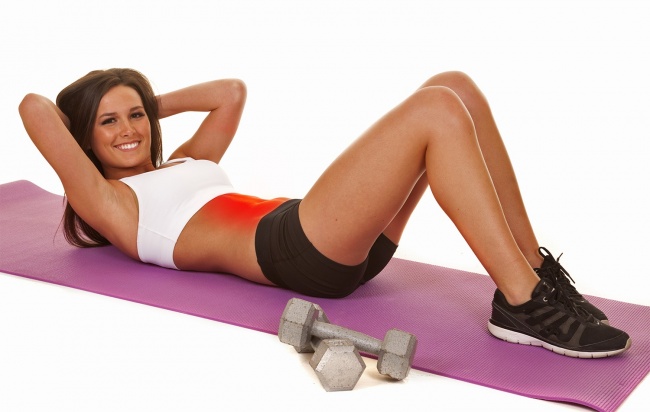
Starting position: lie down on the floor, slightly bend your knees.
The main feature of this exercise is its fast pace. Lift your upper body off the floor and quickly return to the starting position. Make sure your abdominal muscles do not relax during exercise.
Reps: 3 series of 12 to 15 representatives.
Training duration: 2 minutes or more.
Exercise is not recommended for people with any type of gastritis or rheumatism, or gallbladder disease. It should be done carefully by those who have respiratory and / or cardiovascular problems.
4. Plank
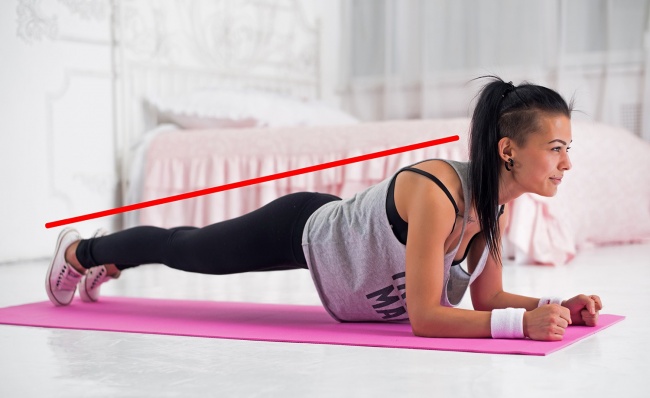
Starting position: hold the body on toes and elbows (or hands).
An important notice: keep your back and legs straight, without sagging or arching.
Reps: 2 to 3 times, 30 seconds each. It is recommended to change the type of plank during exercise. The first set can be done on the hands, the second on the elbows, the third can be a side plank.
Training duration: 2 minutes or more.
Exercise should not be performed if you have recently had a cesarean section (up to 6 months) or other surgery, have tendon problems, inflammation of the internal organs, or problems with the heart and blood vessels.
5. Side Stretching
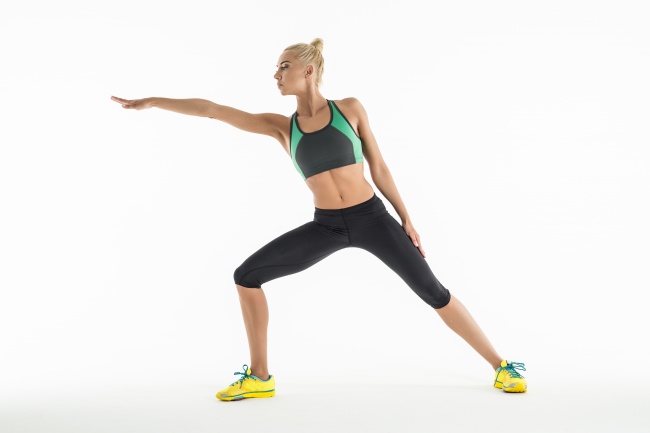
Starting position: Stand with feet 30 to 35 cm apart, keep your arms on your hips.
Inhale, exhale, take out your belly and take a position as if you were going to sit down. Lower your left hand across your body, stretch your right leg to one side, keeping your right arm stretched out to the same side.
Bend your body slightly to the right, staying in this position for eight seconds. Be sure not to lean forward or backward, only to one side.
Reps: 2 to 3 times for each side.
Training duration: 1 minute.
You should be careful with stretching if you have high blood pressure, joint problems, or inflammation of the internal organs.
What exercises work best for you? We’d love to hear about them in the comments!


